When transforming your house to your dream home there are many things to take into consideration. Yes, pretty chandeliers and brand new furniture play a key role, but so does your backyard. When giving a house tour you will want to show your guest your vast grass and shimmering pool, but you can’t forget the thing that ties everything together, your back gate. You may be thinking, how can a back gate, a detail so insignificant to the home tie everything together. Well if you really think about it, everything in your home is a detail almost too small to miss, like that suede couch or lemon tree you insisted on getting saying will tie the home together is also just another small detail, same as your back gate.
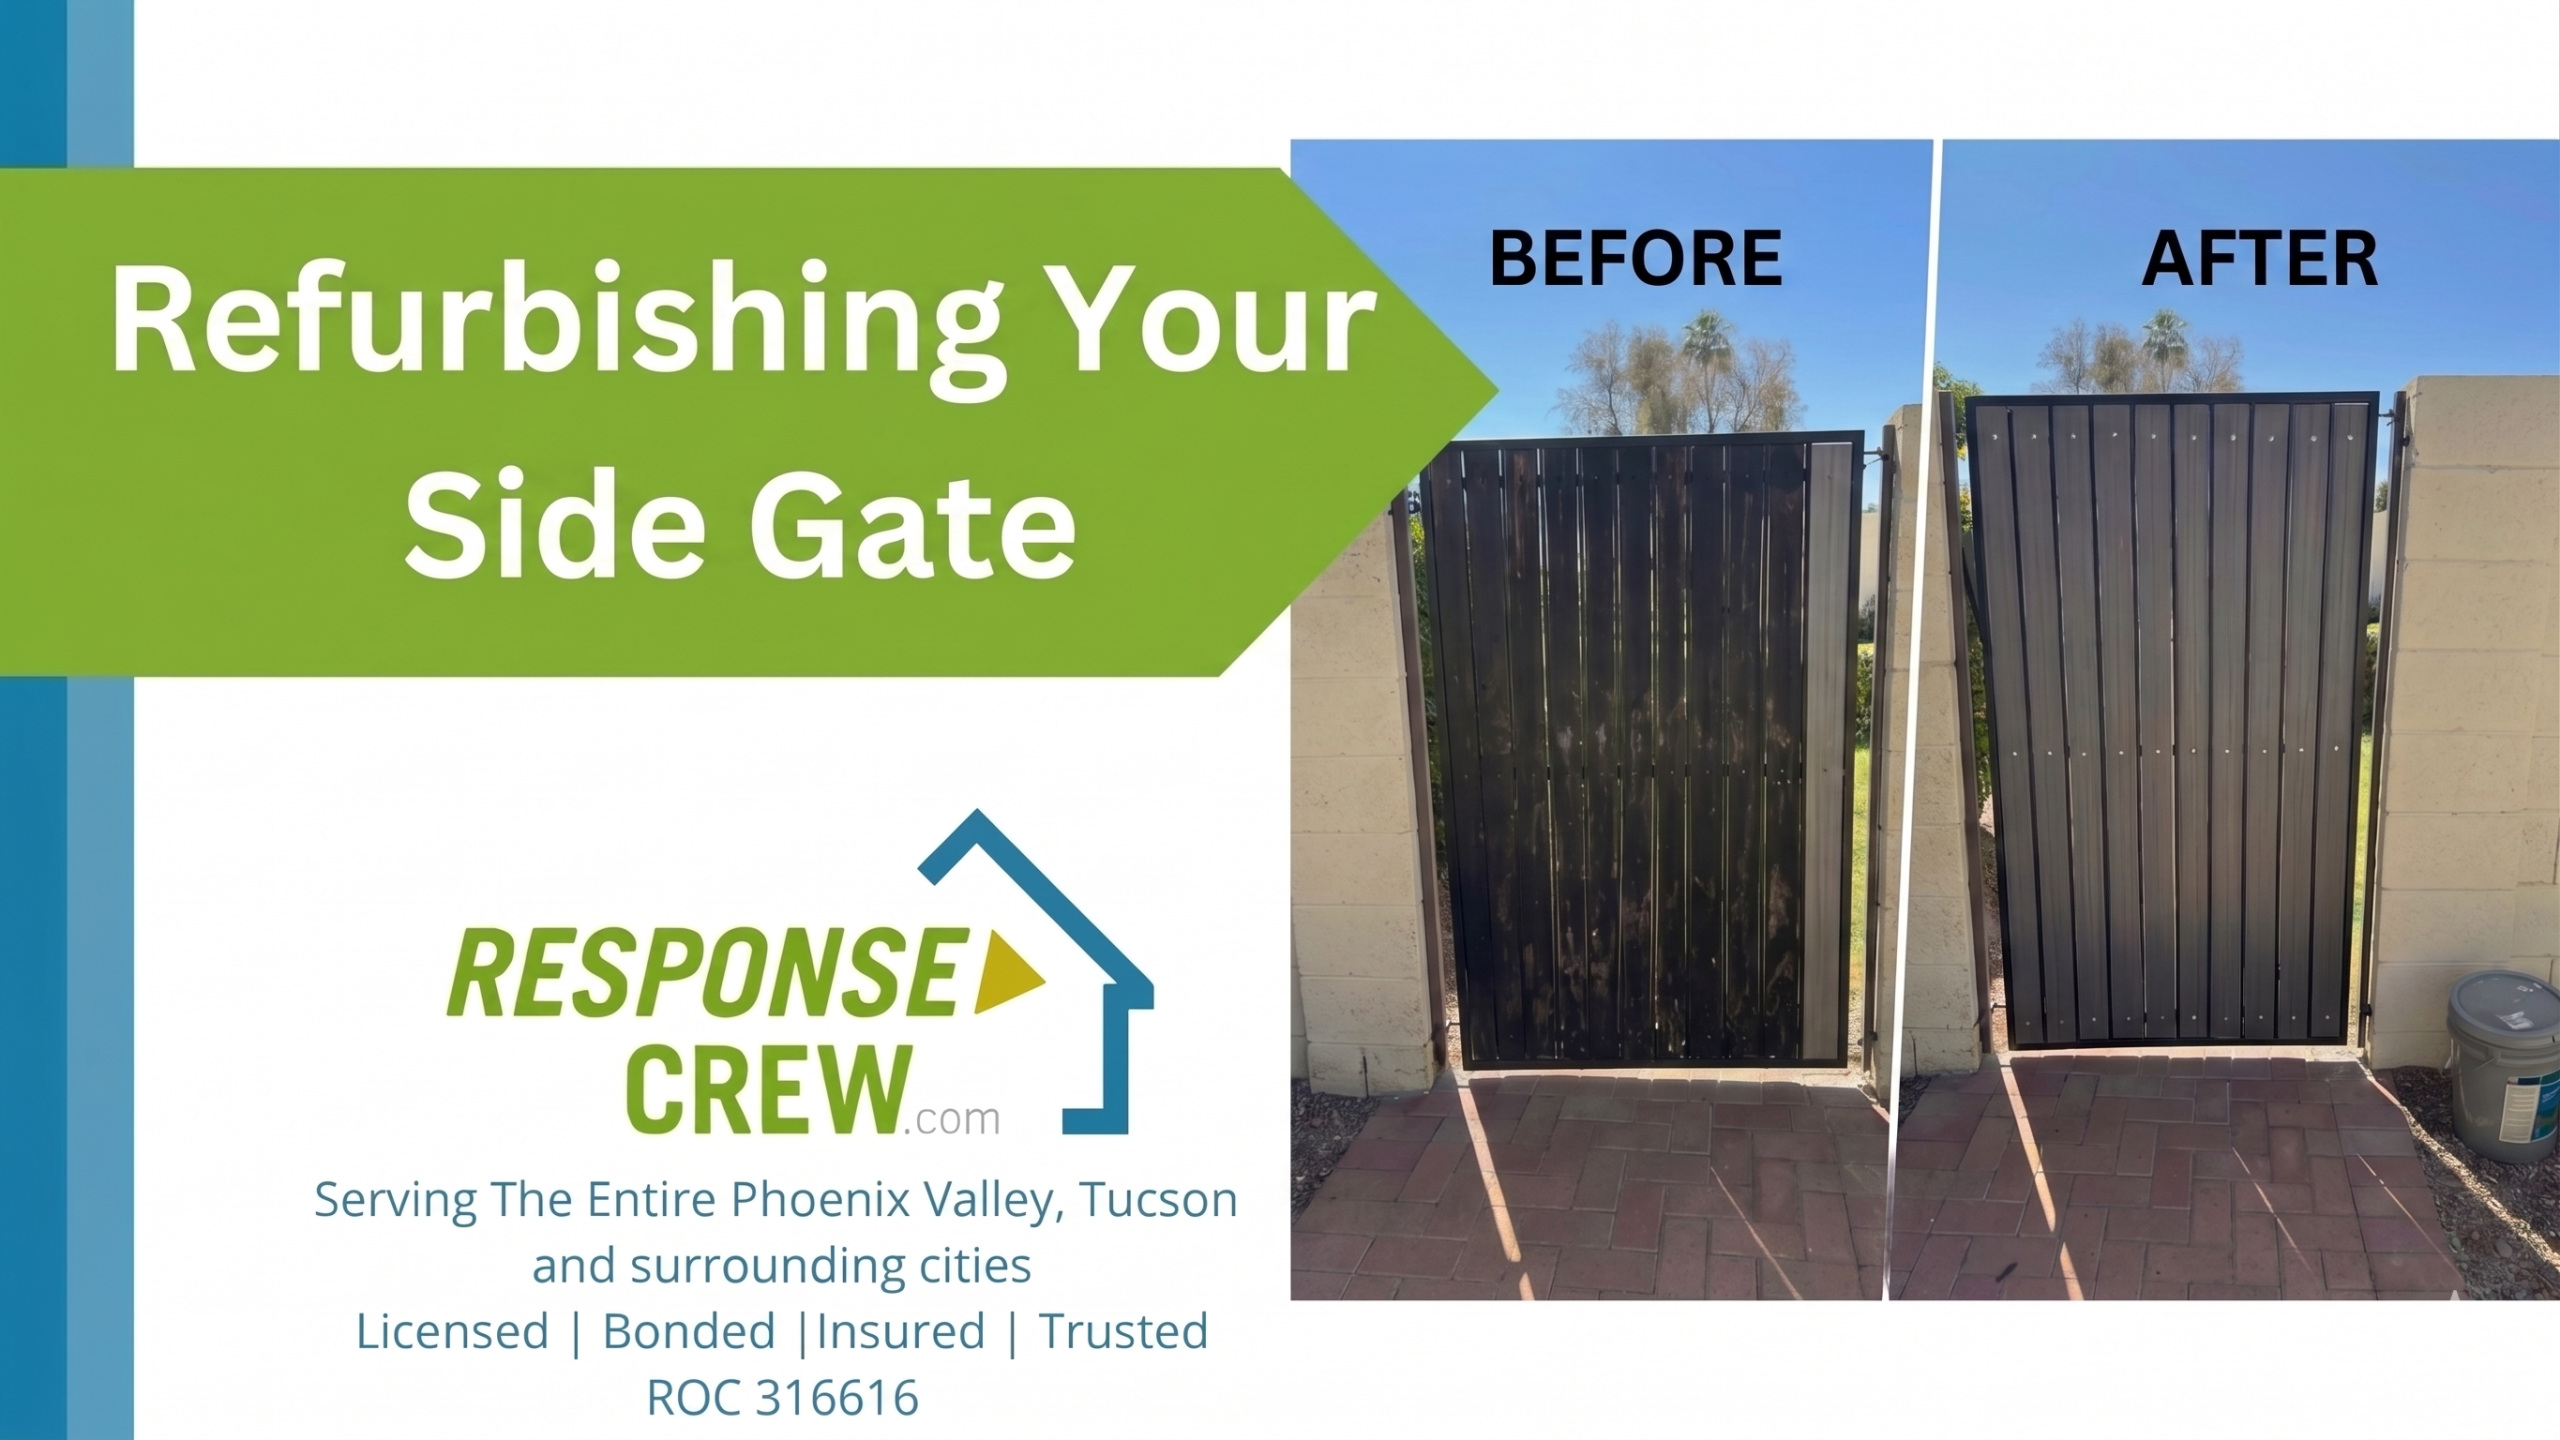
The first step of refurbishing your side gate is to take it off of its hinges. taking it off might require a bit of effort, if the gate has not been maintained in a while. 
If the gate has rusted bolts and is truly stuck use a crowbar and some WD-40. Once you have it off lay it on the ground, preferably with some wooden blocks under for leverage, and sand down all the old paint layers. This will give you a clean canvas for your new paint.
After you create a clean canvas you’re going to want to paint your gate. Make sure to also take into consideration the gates lock and hinges if you want them to match the gate. But wait, before painting you have to apply a primer. The primer will prevent rust and provide a clean smooth surface for your next coat. Then it’s finally time to paint! After every coat of paint let it dry before applying the next layer. Apply a total of three coats for a mat or glossy finish depending on the paint you chose.
After painting your gate you need to apply the wood slacks. You can add these horizontally or vertical. take the measurements of the top middle and bottom, then cut your wood to the exact measurements so it can fit in snug. Your top and bottom may have different measurements so you may have to cut each piece separately with special measurements. After cutting the wood you will stain it. To ensure your wood is getting the best color for it, use a stain that penetrates the wood fibers and protects it from the inside out. After that, bolt the wood slats to the medal bars.
Note about the Slate on this gate (See Photo)
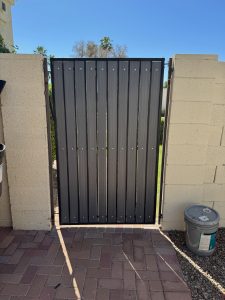 Slats can be made out of either wood or composite. In this gate I chose to go with composite slats. Here are the cons and pros for wood vs composite.
Wood: Pros
Cheap: Wood slats are typically cheap, around $4 per slat. They are also easy to customize in case your spaces in the gate are not even or you have a handle or lock you need to work around
Wood Cons: Wood comes raw, you need to paint the wood adding some expense in material and labor. Wood also deteriorates, effected by weather and water you will need to either paint every few years or replace if they have been left untreated for too long
Composite: Pros
Ready to install, no need for paint. You can cut into shape as needed. Durable to weather elements like water, cold or hot temperature. Nothing lasts for ever but this will last longer then wood with no maintenance needed.
Cons: A bit more expensive, $10 vs the $4 but you don’t need to paint (less labor and material). Once its warped you can’t fix it, you will need to replace. Comes in limited colors, you can paint with an oil base paint. It’s harder to paint.
Overall I recommend the composite for its zero maintenance and longer lasting material.
Once the final bolt is tightened and the gate is back on its hinges, take a step back and admire the transformation. What was once a rusted afterthought is now a statement piece that bridges the gap between your home’s interior style and your backyard.It’s a reminder that a dream home isn’t built in one day but one small detail at a time. Now when you lead your guests outside the tour doesn’t start with the pool, it starts with the perfect gate.